How to Connect to Raspberry Pi via Internet: A Comprehensive Guide
Connecting to a Raspberry Pi via the internet has become an essential skill for tech enthusiasts, hobbyists, and professionals alike. Whether you're managing remote servers, automating smart home devices, or developing IoT projects, this guide will walk you through the process step-by-step. By the end, you'll have the knowledge and tools to securely access your Raspberry Pi from anywhere in the world.
As technology continues to evolve, remote access to devices like Raspberry Pi has become increasingly important. This compact yet powerful device can be used for a wide range of applications, from media centers to web servers. However, accessing it remotely requires careful planning and execution to ensure both functionality and security.
This article aims to provide a detailed, easy-to-follow guide on how to connect to Raspberry Pi via the internet. We'll cover essential topics such as setting up your Raspberry Pi, configuring network settings, and implementing secure connections. By the end of this guide, you'll have the confidence to manage your Raspberry Pi remotely, no matter where you are.
Introduction to Raspberry Pi Remote Access
Understanding Raspberry Pi's Role in Remote Computing
The Raspberry Pi is a versatile single-board computer that has revolutionized the way we approach technology. Its affordability and flexibility make it an ideal choice for projects requiring remote access. Whether you're controlling a robot, monitoring environmental conditions, or running a web server, connecting to Raspberry Pi via the internet is a critical skill.
Remote access allows you to manage your Raspberry Pi without being physically present. This capability is particularly useful for projects that require constant monitoring or interaction, such as IoT devices, remote servers, or automated systems. By learning how to connect to Raspberry Pi via the internet, you'll unlock a world of possibilities for your projects.
Setting Up Your Raspberry Pi for Remote Access
Preparing Your Raspberry Pi for Internet Connection
Before you can connect to Raspberry Pi via the internet, you need to ensure that your device is properly set up. This involves installing the latest version of Raspberry Pi OS, configuring network settings, and enabling necessary services. Follow these steps to prepare your Raspberry Pi:
- Install Raspberry Pi OS on your microSD card.
- Connect your Raspberry Pi to a monitor, keyboard, and mouse for initial setup.
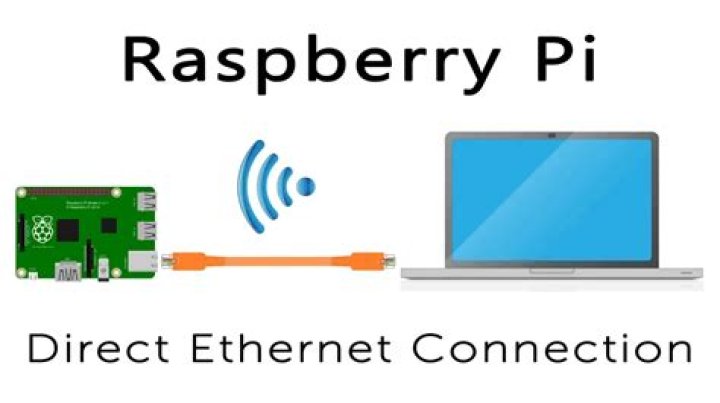
- Ensure your Raspberry Pi is connected to the internet via Ethernet or Wi-Fi.
- Update the operating system using the terminal command:
sudo apt update && sudo apt upgrade.
Once your Raspberry Pi is set up, you can proceed to configure it for remote access. This step is crucial for establishing a secure and stable connection.
Using SSH to Connect to Raspberry Pi via Internet
Enabling SSH on Raspberry Pi
Secure Shell (SSH) is one of the most common methods for connecting to Raspberry Pi via the internet. It provides a secure and encrypted connection, making it ideal for remote access. To enable SSH on your Raspberry Pi, follow these steps:
- Open the Raspberry Pi Configuration tool:
sudo raspi-config. - Navigate to "Interfacing Options" and select "SSH."
- Choose "Yes" to enable SSH and exit the configuration tool.
- Reboot your Raspberry Pi:
sudo reboot.
With SSH enabled, you can now connect to your Raspberry Pi using an SSH client like PuTTY (Windows) or the terminal (macOS/Linux). Simply use the command: ssh pi@.
Configuring Network Settings
Setting Up Static IP Address
Assigning a static IP address to your Raspberry Pi ensures that its network address remains consistent. This is important for maintaining a reliable connection when accessing it remotely. To set up a static IP address:
- Open the terminal and edit the DHCP configuration file:
sudo nano /etc/dhcpcd.conf. - Add the following lines at the end of the file:
 interface eth0
 static ip_address=192.168.1.100/24
 static routers=192.168.1.1
static domain_name_servers=192.168.1.1 - Save the file and reboot your Raspberry Pi.
A static IP address simplifies the process of connecting to your Raspberry Pi, especially when using SSH or other remote access tools.
Enhancing Security for Remote Connections
Implementing Best Practices for Secure Connections
Security should always be a top priority when connecting to Raspberry Pi via the internet. Here are some best practices to enhance the security of your remote connections:
- Change the default password for the "pi" user account.
- Disable password-based authentication and use SSH keys instead.
- Install a firewall to restrict access to your Raspberry Pi.
- Regularly update your Raspberry Pi OS and installed packages.
By following these security measures, you can protect your Raspberry Pi from unauthorized access and potential cyber threats.
Tools and Software for Remote Access
Exploring Alternative Tools for Connecting to Raspberry Pi
While SSH is the most popular method for remote access, there are other tools and software that can simplify the process:
- VNC Viewer: Allows you to access the graphical desktop of your Raspberry Pi remotely.
- Ngrok: Provides a secure tunnel to your Raspberry Pi, enabling easy access from the internet.
- Port Forwarding: Configures your router to direct incoming traffic to your Raspberry Pi.
These tools offer additional flexibility and functionality, making it easier to manage your Raspberry Pi from anywhere in the world.
Common Issues and Troubleshooting
Addressing Common Problems When Connecting to Raspberry Pi
Despite careful preparation, you may encounter issues when trying to connect to Raspberry Pi via the internet. Here are some common problems and their solutions:
- Connection Refused: Ensure SSH is enabled and your Raspberry Pi is connected to the internet.
- Incorrect IP Address: Verify the IP address of your Raspberry Pi using the command:
hostname -I. - Firewall Blocking: Check your router's firewall settings and allow incoming traffic on the necessary ports.
Troubleshooting these issues requires patience and attention to detail, but with persistence, you can resolve most problems.
Connecting Through Public Internet
Accessing Raspberry Pi from Anywhere in the World
To connect to Raspberry Pi via the internet from a public network, you'll need to configure port forwarding on your router. This process involves directing incoming traffic on a specific port to your Raspberry Pi's local IP address. Follow these steps:
- Log in to your router's admin interface.
- Navigate to the "Port Forwarding" or "Virtual Server" settings.
- Add a new rule to forward port 22 (default SSH port) to your Raspberry Pi's static IP address.
- Save the settings and test the connection using your external IP address.
With port forwarding set up, you can access your Raspberry Pi from any location with an internet connection.
Automating Remote Connections
Simplifying the Process with Automation Tools
Automating remote connections can save you time and effort, especially if you frequently access your Raspberry Pi. Consider using tools like:
- Ansible: A configuration management tool that allows you to automate tasks on your Raspberry Pi.
- Cron Jobs: Schedule scripts to run automatically at specified intervals.
- Cloud Services: Use platforms like AWS or Google Cloud to host your Raspberry Pi projects and manage them remotely.
Automation not only simplifies the process but also ensures consistency and reliability in your remote operations.
Conclusion and Final Tips
Connecting to Raspberry Pi via the internet opens up a world of possibilities for remote management and automation. By following the steps outlined in this guide, you can securely access your Raspberry Pi from anywhere in the world. Remember to prioritize security, regularly update your system, and explore alternative tools for enhanced functionality.
We encourage you to share your experiences and tips in the comments below. If you found this guide helpful, consider sharing it with others who may benefit from it. For more articles on Raspberry Pi and related technologies, explore our website further. Happy tinkering!
References: