Mastering Remote Control Raspberry Pi from Windows: The Ultimate Guide
In today's digital age, controlling a Raspberry Pi remotely from a Windows PC is an essential skill for tech enthusiasts, developers, and hobbyists alike. This ability opens up endless possibilities, from automating home systems to managing remote servers. With the right tools and techniques, you can seamlessly operate your Raspberry Pi without needing physical access to the device.
Whether you're a beginner or an experienced user, understanding how to remote control Raspberry Pi from Windows can significantly enhance your productivity and expand your project capabilities. This guide will walk you through the process step-by-step, ensuring you have all the knowledge you need to connect to your Raspberry Pi remotely.
Throughout this article, we'll cover everything from setting up your Raspberry Pi for remote access to troubleshooting common issues. By the end, you'll be equipped with the skills to control your Raspberry Pi effortlessly from any Windows machine, no matter where you are.
Introduction to Remote Control Raspberry Pi from Windows
Remote control Raspberry Pi from Windows has become increasingly popular due to its versatility and ease of use. This method allows users to interact with their Raspberry Pi without needing direct access to the device, making it ideal for projects that require off-site management or monitoring.
By leveraging tools like SSH (Secure Shell) and VNC (Virtual Network Computing), you can execute commands, transfer files, and even control the graphical user interface of your Raspberry Pi from the comfort of your Windows PC. This setup is particularly useful for automating tasks, managing servers, or running applications remotely.
Understanding Raspberry Pi Basics
Before diving into remote control techniques, it's essential to understand the basics of Raspberry Pi. A Raspberry Pi is a small, affordable computer that can be used for various applications, from home automation to web servers. It runs on Linux-based operating systems, such as Raspberry Pi OS, which provide a robust platform for development and experimentation.
Key Features of Raspberry Pi
- Compact and energy-efficient design
- Support for multiple programming languages
- Compatibility with various peripherals and add-ons
- Open-source community support
These features make Raspberry Pi an excellent choice for remote control applications, as it can be easily configured to work with different protocols and tools.
Setting Up Your Raspberry Pi for Remote Access
To enable remote control Raspberry Pi from Windows, you first need to set up your Raspberry Pi correctly. This involves configuring the operating system, enabling necessary services, and ensuring network connectivity.
Step 1: Install Raspberry Pi OS
Begin by installing Raspberry Pi OS on your device. This operating system provides the foundation for remote access tools and ensures compatibility with Windows-based solutions. You can download the latest version of Raspberry Pi OS from the official website.
Step 2: Enable SSH and VNC
Once Raspberry Pi OS is installed, enable SSH and VNC services. These protocols are crucial for remote communication and can be activated through the Raspberry Pi Configuration tool or by editing the boot configuration file.
Essential Tools for Windows Users
Windows users have access to several tools that facilitate remote control Raspberry Pi from Windows. Below are some of the most commonly used tools:
Tool 1: PuTTY
PuTTY is a free and widely-used SSH client for Windows. It allows you to connect to your Raspberry Pi via SSH and execute commands directly from your Windows PC.
Tool 2: VNC Viewer
VNC Viewer provides graphical access to your Raspberry Pi, enabling you to interact with the desktop environment as if you were physically present. This tool is especially useful for tasks that require a graphical interface.
Connecting via SSH
SSH (Secure Shell) is one of the most secure and reliable methods for remote control Raspberry Pi from Windows. By establishing an SSH connection, you can execute commands, transfer files, and manage your Raspberry Pi remotely.
Steps to Connect via SSH
- Install PuTTY on your Windows PC.
- Open PuTTY and enter the IP address of your Raspberry Pi in the "Host Name" field.
- Set the connection type to "SSH" and click "Open."
- Log in using your Raspberry Pi credentials.
Once connected, you can start issuing commands to control your Raspberry Pi from your Windows machine.
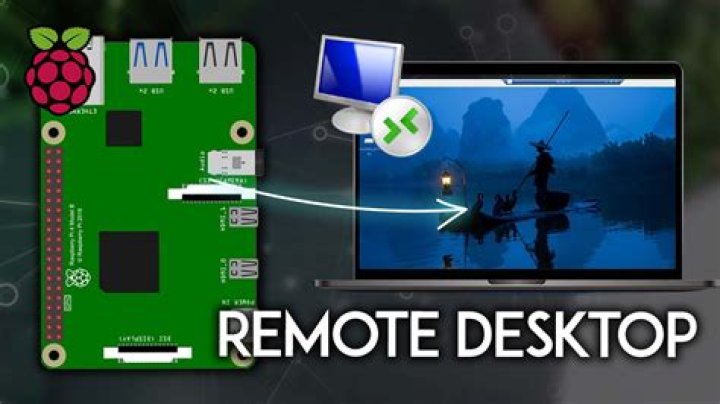
Using VNC for Graphical Remote Access
For users who prefer graphical interaction, VNC (Virtual Network Computing) offers a seamless way to control Raspberry Pi from Windows. By setting up VNC on your Raspberry Pi and using a VNC client on your Windows PC, you can access the desktop environment remotely.
Steps to Set Up VNC
- Enable VNC on your Raspberry Pi through the Raspberry Pi Configuration tool.
- Install VNC Viewer on your Windows PC.
- Enter the IP address of your Raspberry Pi in VNC Viewer and connect.
- Log in using your Raspberry Pi credentials.
VNC provides a user-friendly interface for managing your Raspberry Pi remotely, making it ideal for beginners and advanced users alike.
Configuring Network Settings
Proper network configuration is critical for successful remote control Raspberry Pi from Windows. This involves setting up static IP addresses, configuring firewalls, and ensuring network connectivity.
Tips for Network Configuration
- Assign a static IP address to your Raspberry Pi for consistent access.
- Configure your router to forward necessary ports for SSH and VNC.
- Ensure your network firewall allows incoming connections on the required ports.
By optimizing your network settings, you can improve the reliability and performance of your remote control setup.
Implementing Security Measures
Security is a top priority when controlling Raspberry Pi from Windows remotely. To protect your device from unauthorized access, implement the following security measures:
Security Best Practices
- Use strong, unique passwords for your Raspberry Pi.
- Enable two-factor authentication (2FA) wherever possible.
- Regularly update your Raspberry Pi OS and installed software.
- Monitor incoming connections and block suspicious activity.
By adhering to these security practices, you can safeguard your Raspberry Pi and ensure secure remote access.
Troubleshooting Common Issues
Even with proper setup, issues may arise when attempting to remote control Raspberry Pi from Windows. Below are some common problems and their solutions:
Issue 1: Unable to Connect via SSH
If you're unable to establish an SSH connection, verify that SSH is enabled on your Raspberry Pi and that the IP address is correct. Additionally, ensure that your firewall allows incoming SSH connections.
Issue 2: Slow VNC Performance
Slow VNC performance can be caused by network congestion or insufficient bandwidth. To resolve this, optimize your network settings and consider using a wired connection for improved speed and reliability.
Advanced Techniques for Remote Control
For users seeking more advanced capabilities, there are several techniques to enhance your remote control Raspberry Pi from Windows experience. These include automating tasks with scripts, setting up remote desktop environments, and utilizing cloud-based solutions.
Automating Tasks with Scripts
By writing scripts in languages like Python or Bash, you can automate repetitive tasks and streamline your workflow. This not only saves time but also reduces the risk of errors.
Setting Up Remote Desktop Environments
For a more comprehensive remote control experience, consider setting up a remote desktop environment using tools like X2Go or NoMachine. These solutions provide a seamless desktop experience and support advanced features like file sharing and clipboard synchronization.
Conclusion
In conclusion, mastering remote control Raspberry Pi from Windows opens up a world of possibilities for tech enthusiasts and professionals alike. By following the steps outlined in this guide, you can effectively set up and manage your Raspberry Pi remotely, enhancing your productivity and expanding your project capabilities.
We encourage you to experiment with the techniques discussed and share your experiences in the comments below. Additionally, don't forget to explore other articles on our site for more insightful content and valuable tips. Together, let's continue to push the boundaries of technology and innovation!