Unlock the Power of Remote IoT Platform SSH Raspberry Pi Download
In today's digital age, remote IoT platform SSH Raspberry Pi download has become an essential tool for tech enthusiasts, professionals, and hobbyists alike. The ability to remotely control and manage IoT devices using Raspberry Pi opens up a world of possibilities for smart home automation, industrial monitoring, and more. This comprehensive guide will delve into everything you need to know about setting up a secure SSH connection on your Raspberry Pi for remote IoT applications.
As the Internet of Things (IoT) continues to grow, the demand for efficient and secure remote management solutions has never been higher. By leveraging Raspberry Pi's capabilities, users can create robust IoT platforms that can be accessed from anywhere in the world. This article will explore the step-by-step process of downloading and configuring SSH on your Raspberry Pi for remote IoT applications.
Whether you're a beginner or an experienced user, this guide will provide valuable insights into the tools, techniques, and best practices for setting up a secure remote IoT platform. You'll learn how to download and install SSH on your Raspberry Pi, configure it for optimal performance, and troubleshoot common issues that may arise during the setup process.
Understanding Remote IoT Platform SSH Raspberry Pi Download
What is IoT and Its Importance in Modern Technology
The Internet of Things (IoT) refers to the network of interconnected devices that communicate and exchange data over the internet. These devices range from simple sensors to complex industrial machinery, all designed to enhance efficiency, automation, and data collection. IoT plays a crucial role in various industries, including healthcare, manufacturing, agriculture, and smart homes.
Key benefits of IoT include:
- Improved operational efficiency
- Enhanced data collection and analysis
- Automation of repetitive tasks
- Cost savings through optimized resource usage
The Role of Raspberry Pi in IoT Applications
Raspberry Pi is a small, affordable, and powerful computer that has revolutionized the world of IoT. Its versatility, combined with its low cost and ease of use, makes it an ideal platform for developing IoT applications. Raspberry Pi supports a wide range of programming languages, libraries, and hardware interfaces, making it suitable for both beginners and advanced users.
Some of the key features of Raspberry Pi include:
- Support for multiple operating systems, including Raspbian, Ubuntu, and others
- Built-in GPIO pins for interfacing with sensors and actuators
- Support for Wi-Fi and Ethernet connectivity
- Compatibility with a wide range of accessories and expansion boards
Setting Up SSH on Raspberry Pi
What is SSH and Why is It Important?
Secure Shell (SSH) is a cryptographic network protocol that enables secure communication between devices over an unsecured network. It provides a secure way to access remote servers, transfer files, and execute commands. SSH is widely used in IoT applications to ensure secure communication between devices and prevent unauthorized access.
Key benefits of using SSH include:
- Encryption of data during transmission
- Authentication of users and devices
- Protection against eavesdropping and man-in-the-middle attacks
Downloading and Installing SSH on Raspberry Pi
To set up SSH on your Raspberry Pi, follow these steps:
- Download the latest version of Raspberry Pi OS from the official website
- Install Raspberry Pi Imager and flash the OS image onto an SD card
- Insert the SD card into your Raspberry Pi and power it on
- Connect your Raspberry Pi to a monitor, keyboard, and mouse
- Open the terminal and type "sudo apt update" to update the package list
- Type "sudo apt install openssh-server" to install the SSH server
- Enable SSH by typing "sudo systemctl enable ssh" and "sudo systemctl start ssh"
Configuring Raspberry Pi for Remote IoT Applications
Setting Up a Static IP Address
A static IP address ensures that your Raspberry Pi always has the same address, making it easier to connect remotely. To set up a static IP address:
- Open the terminal and type "sudo nano /etc/dhcpcd.conf"
- Add the following lines to the file:
interface eth0
static ip_address=192.168.1.100/24
static routers=192.168.1.1
static domain_name_servers=192.168.1.1
Replace the IP address, router, and DNS server with your network settings.
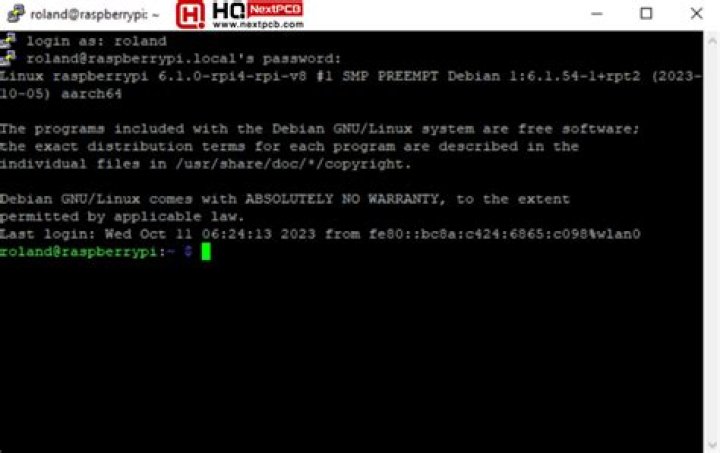
Enabling Remote Access via SSH
To enable remote access to your Raspberry Pi via SSH:
- Find your Raspberry Pi's IP address by typing "hostname -I" in the terminal
- On your remote computer, open a terminal or command prompt
- Type "ssh pi@
" and press Enter - Enter the password when prompted (default password is "raspberry")
Best Practices for Secure Remote IoT Platforms
Implementing Strong Password Policies
Strong passwords are essential for securing your remote IoT platform. Follow these best practices:
- Use a combination of uppercase and lowercase letters, numbers, and symbols
- Avoid using common words or phrases
- Change passwords regularly and avoid reusing old passwords
Using Key-Based Authentication
Key-based authentication provides an additional layer of security by eliminating the need for passwords. To set up key-based authentication:
- Generate an SSH key pair on your remote computer using "ssh-keygen"
- Copy the public key to your Raspberry Pi using "ssh-copy-id pi@
" - Disable password authentication by editing the SSH configuration file
Troubleshooting Common Issues
Resolving SSH Connection Problems
Common SSH connection issues include:
- Incorrect IP address or hostname
- Firewall or router blocking SSH traffic
- SSH service not running on Raspberry Pi
To resolve these issues, ensure that:
- Your Raspberry Pi's IP address is correct
- Port 22 is open on your router and firewall
- The SSH service is running on your Raspberry Pi
Dealing with Network Configuration Errors
Network configuration errors can prevent your Raspberry Pi from connecting to the internet. To troubleshoot:
- Check your network settings and ensure they are correct
- Restart your router and modem
- Test the connection using "ping google.com" in the terminal
Advanced Features for Remote IoT Platforms
Automating Tasks with Cron Jobs
Cron jobs allow you to schedule tasks to run automatically at specified intervals. To create a cron job:
- Open the crontab editor by typing "crontab -e" in the terminal
- Add a line with the desired schedule and command
- Save and exit the editor
Monitoring System Performance
Monitoring your Raspberry Pi's performance ensures that it is running smoothly. Use tools like "top," "htop," and "glances" to monitor CPU, memory, and disk usage.
Conclusion
In conclusion, setting up a remote IoT platform SSH Raspberry Pi download is a powerful way to enhance your IoT applications. By following the steps outlined in this guide, you can create a secure and efficient remote management solution for your IoT devices. Remember to implement best practices for security, such as strong passwords and key-based authentication, to protect your system from unauthorized access.
We encourage you to share your experiences and insights in the comments below. Have you tried setting up a remote IoT platform using Raspberry Pi? What challenges did you face, and how did you overcome them? For more articles on IoT, Raspberry Pi, and related topics, explore our website and stay updated with the latest trends and technologies.