Mastering Pumpkin Growing Stages: A Comprehensive Guide for Success
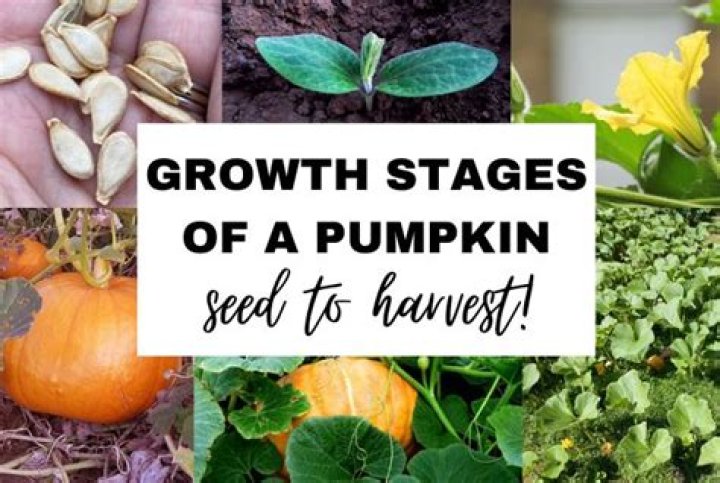
Pumpkin growing stages are an exciting journey for every gardener, whether you're a beginner or an experienced green thumb. Pumpkins, with their vibrant orange hue and versatile uses, have become a staple in gardens worldwide. Understanding the various stages of pumpkin growth can significantly enhance your gardening experience and yield a bountiful harvest.
Gardening enthusiasts often find themselves captivated by the beauty and utility of pumpkins. From decorative purposes to culinary delights, pumpkins offer a wide range of possibilities. However, to achieve optimal results, it's essential to familiarize yourself with the pumpkin growing stages and the factors influencing each phase.
This article will delve into the intricacies of pumpkin cultivation, providing you with actionable insights and expert advice. Whether you're planting pumpkins for Halloween festivities or aiming to grow prize-winning specimens, this guide will equip you with the knowledge needed to succeed.
Introduction to Pumpkin Growing Stages
Pumpkins are a beloved crop for many gardeners, and understanding pumpkin growing stages is crucial for a successful harvest. The process begins with selecting the right seeds and preparing the soil, followed by carefully monitoring each stage of development. By mastering these stages, you can ensure that your pumpkins thrive and produce the desired results.
Stage 1: Seed Selection and Preparation
Selecting High-Quality Seeds
Choosing the right pumpkin seeds is the foundation of a successful harvest. Consider factors such as variety, climate suitability, and intended use when selecting seeds. Popular varieties include Jack-o'-Lantern, Atlantic Giant, and Sugar Pie. Each variety has unique characteristics that cater to different gardening goals.
Preparing Seeds for Planting
Before planting, it's essential to prepare the seeds properly. Soak them in water for 24 hours to enhance germination rates. Additionally, inspect the seeds for any signs of damage or disease to ensure only the healthiest seeds are planted.
Stage 2: Germination Process
Germination is a critical phase in pumpkin growing stages. During this period, the seeds begin to sprout, marking the start of a new life cycle. To facilitate germination, maintain soil temperatures between 70°F and 95°F (21°C to 35°C). Use a seedling heat mat if necessary to regulate temperature.
Factors Influencing Germination
- Soil Moisture: Keep the soil consistently moist but not waterlogged.
- Light Exposure: Pumpkin seeds do not require light during germination.
- Air Circulation: Ensure proper airflow to prevent mold and fungal growth.
Stage 3: Seedling Development
Once the seeds have germinated, the seedlings begin to develop. This stage is characterized by the emergence of the first true leaves. Seedlings require ample sunlight, nutrients, and water to grow strong and healthy.
Nurturing Seedlings
- Provide at least 6-8 hours of direct sunlight daily.
- Fertilize with a balanced, water-soluble fertilizer every two weeks.
- Transplant seedlings into larger containers if they outgrow their original pots.
Stage 4: Transplanting
Transplanting is a pivotal stage in pumpkin growing stages. Once the seedlings have developed a robust root system, they are ready to be moved to their permanent location in the garden. Choose a sunny spot with well-drained soil and ample space for vine growth.
Preparing the Soil
Amend the soil with organic matter such as compost or well-rotted manure to enrich its nutrient content. Test the soil pH and adjust it to a range of 6.0 to 6.8 for optimal pumpkin growth.
Stage 5: Vine Growth
As the plants mature, their vines begin to spread across the garden. Proper vine management is essential to ensure healthy growth and prevent overcrowding. Regularly prune excess foliage to improve air circulation and reduce the risk of disease.
Training Vines
Use stakes or trellises to support the vines if space is limited. This technique not only conserves space but also enhances fruit quality by keeping the pumpkins off the ground.
Stage 6: Flowering
Flowering signifies the transition from vegetative growth to reproductive development. Pumpkin plants produce both male and female flowers, with pollination being a crucial step in fruit set. Encourage pollinators like bees to visit your garden by planting companion plants such as marigolds and lavender.
Pollination Techniques
- Hand-pollinate if necessary by transferring pollen from male to female flowers using a small brush.
- Avoid using pesticides during flowering to protect beneficial insects.
Stage 7: Fruit Set
After successful pollination, the female flowers develop into small pumpkins. This stage requires careful attention to ensure the fruits grow uniformly and reach their full potential. Monitor water intake and nutrient levels to support fruit development.
Thinning Fruits
To concentrate the plant's energy on producing fewer but larger pumpkins, consider thinning the fruits. Remove excess fruits, leaving only the healthiest ones on each vine.
Stage 8: Maturation
Maturation is the final stage before harvesting. During this period, the pumpkins develop their characteristic color, texture, and flavor. Regularly inspect the fruits for signs of ripeness, such as a deep orange hue and a hard rind.
Signs of Ripeness
- Tap the pumpkin; a hollow sound indicates maturity.
- Check the stem; it should be dry and woody.
- Test the skin with your fingernail; it should resist puncture.
Stage 9: Harvesting
Harvesting is the culmination of all your hard work. Use a sharp knife or pruners to cut the pumpkin from the vine, leaving a few inches of stem attached. This helps prevent rot and extends the pumpkin's shelf life.
Post-Harvest Care
Cure the pumpkins by exposing them to direct sunlight for 10-14 days. This process hardens the skin and enhances storage durability. Store cured pumpkins in a cool, dry place with good ventilation.
Tips for Successful Pumpkin Growing
Common Challenges and Solutions
- Pests: Use organic pest control methods such as neem oil or insecticidal soap.
- Diseases: Practice crop rotation and avoid overhead watering to minimize disease risks.
- Weeds: Mulch around the plants to suppress weed growth and retain soil moisture.
Maximizing Yield
Implement companion planting techniques to enhance soil health and deter pests. Rotate pumpkin crops annually to prevent nutrient depletion and disease buildup.
Conclusion
Pumpkin growing stages are a fascinating journey that offers immense satisfaction and rewards. By following the guidelines outlined in this article, you can cultivate healthy, vibrant pumpkins that meet your gardening objectives. Remember to monitor each stage closely and adjust your practices as needed to ensure optimal results.
We invite you to share your pumpkin-growing experiences and tips in the comments section below. Additionally, explore other articles on our website for more gardening insights and inspiration. Happy gardening!
Data Sources: USDA, Purdue University Extension, University of Illinois Extension.